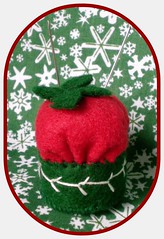
I made up these little beauties for a swapbot potholder swap. The inspiration for them came from Pink Penguin. Ayumills is just so talented that you will want to try out her sewing tutorials. The teapot tutorial is found here and includes a downloadable pattern. My advice is to have your computer nearby while you are making the pattern, because I didn't and the photos would have really helped my attempt turn out a little better. The brown potholder is made from some chocolate lollipop charms I bought a while back. Can I just say that I LOVE LOVE LOVE Anna Maria Horner's fabric. It is awesome. I am going to try to make one of Ayumills' other tutorial patterns with the rest of the charms - a Reversible Patchwork Bag.
Wednesday, May 20, 2009
Saturday, May 16, 2009
kokeshi dotee love
received in a swapbot swap
I am in love with her
she is simply perfect
thanks to rubberstampcollector
for making her
Thursday, April 2, 2009
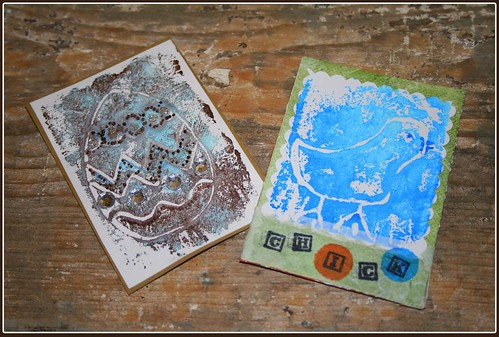
MonoPrint ATC
I joined the "Easy Mono Print" Atc swap on swapbot. It seemed like a good idea at the time, but I found that making a mono print that was acceptable for swapping was harder than it looked!
What is a Mono Print? Well, it is the most basic form of making a print. You apply color (paint) to the surface of something, then place another surface on top (paper or fabric), press down, remove your paper, and you have a unique painted print! It has been described here as:
The monoprint or monotype is often thought of as a halfway stage between painting and printmaking. The process is simple: the artist paints, rubs, or wipes the design directly onto a plate, using a fairly slow drying paint or ink. The fleeting image must be printed before the ink dries. Printing may be by press or by hand, and as the name monoprint implies, one can usually get only one strong impression. The effect must be guessed right from the start; there will be no trial proofs or different states unless the design is redrawn for a second impression. This term is used to refer to any print made in one version and incapable of being repeated. A monoprint cannot be editioned.Mono prints are supposed to allow for artistic spontaneity which I found out pretty quickly. In my usual "fly by the seat of my pants" way of doing things, I decided to give this a try using the directions on swapbot:
Use a roller or a paint brush to spread the paint over an area big enough for your work. You will have to work rather quickly before the paint gets too dry. Using a stick or end of your brush or a pencil, draw a pattern or a quick sketch into the paint. It will be printed in reverse so remember this if adding text. Now place your paper onto your glass and give a quick, even rub with your hand and peel off immediately.
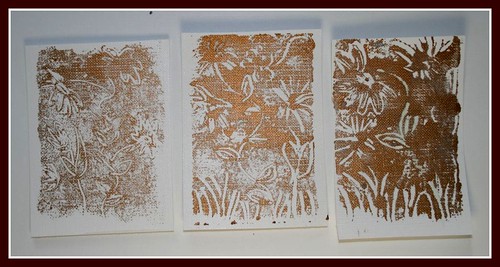
First, I tried flowers.
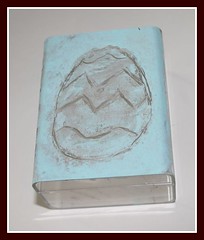
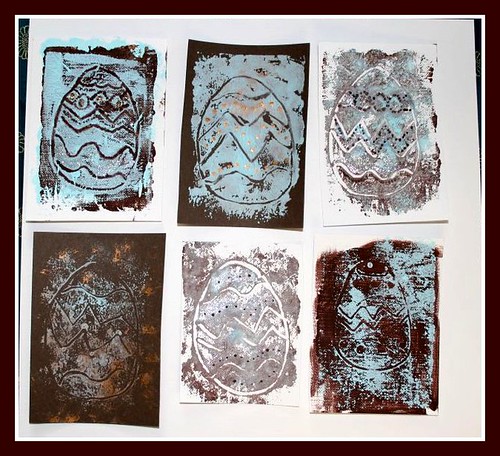
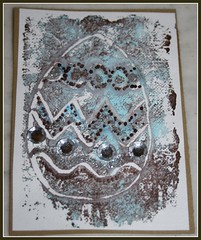
For the next one, I figured that if I used something wider to lift the paint off the surface, it would make the design stand out more. I found a pencil with a nice round eraser on top and used that. It worked great on this little chick.
- How to make a Mono Print
- MonoPrint for Beginners and Children
- Janet Clare's Tutorial
- Making Monoprint Background Papers - I quickly discovered that all the rejects would make great backgrounds for other ATC's. This little tutorial will show you how!
- Take it one step farther with a Monoprint Mini Book!
Tuesday, March 10, 2009
Blog Swapping
Friday, February 13, 2009
Lucky Week!

Tuesday, February 3, 2009
Snow Day - Not

Wednesday, January 28, 2009
Dotee Doll Swap

Tuesday, December 9, 2008
Handmade Gifts to Go!
I finally finished the ornaments for the ornament swap. It was great to see all those little houses wrapped up and ready to go to their new homes! I made a trip to the post office with 10 of them. Hopefully, they will arrive at their destinations (California, Florida, Indiana, Michigan, Rhode Island, Spain, Texas, United Kingdom, and Wisconsin (2))
Now, I have moved on to my next goal - getting all the gifts out in the mail to relatives. I like to send gifts to my nieces and nephews who live on the west coast. I made this little bag up for my 5 year old niece. I was inspired by the little bag that Anna Maria Horner made for her daughter written about in this blog entry.

I used some Alexander Henry (fabric for the imagination!) for the base. It has little birds on it. I am really impressed with the weave of this fabric. It is top quality!
 I am particularly proud of the monogrammed "K" on the front. It was my first attempt at this type of embroidery, and I am pleased with the results. I used a carbon template from the Sublime Stitching: Hundreds of Hip Embroidery Patterns and How-To
I filled the bag with some amigurumi birdies, a little blankie, some mini-markers and two little coloring books. I crocheted the little birds about a year ago, during my amigurumi phase, and was saving them for something like this! I can't remember the pattern I used, but on a quick search I found this free pattern that looks really similar!

Tuesday, November 25, 2008
Pin Cushion Swap

I signed up for a pincushion swap on Swap-bot today. That sounds like fun. I have a hoard of pincushions already made, so I won't have to put too much added work into the mix. Here is a simple one I made from a bottle cap
How About Orange's Tiny Pin Cushion Tutorial
paper.string.cloth patchwork pincushion
Martha Stewart's strawberry pincushions
a wrist pin cushion from the Green Kitchen

Friday, November 14, 2008
Quick Ribbon Swap
I sent off some little scraps of ribbon today for a ribbon swap on swap-bot. It was quick and easy and the little envelope is on its way to Indiana!
Wednesday, November 12, 2008
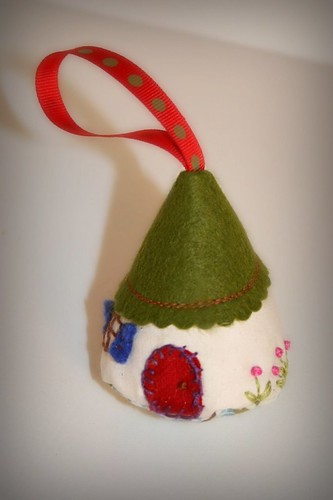
Little House Ornament
I decided it was time to start thinking about making some ornaments since I signed up for the Ornament Swap again this year. I received my list of swap partners yesterday. The group is being administered by swap-bot. This is a pretty cool site, especially if you like to participate in swaps. I signed up for another swap that is swapping ribbon! I think it is interesting and awesome that most of my swapping partners in the ornament swap are from the opposite parts of the USA than me, and two are from other countries! Last year my whole family got into the excitement of receiving the different ornaments. I hoping that this year will be just as much fun.
To get in the mood, I did a quick GOOGLE search of handmade ornaments. The first site that popped up was Pimp Stitch. I was a little taken back by the name, but clicked anyways. Well, I hit the motherload - not only was there the absolute best tutorial here for a wee little house ornament, but there were tutorials for lots of embroidery related crafts!
The most recent post on the blog chronicled an interview with Jenny Hart of Sublime Stitching: Hundreds of Hip Embroidery Patterns and How-To. Do you ever think that things just are supposed to happen, like clicking to a blog on a whim, and finding just exactly what you are currently interested in? During a recent surgical recuperation, I used the book Sublime Stitching to start learning how to embroider with it's great projects and patterns.
So, last night I took the plunge and made one of the little house ornaments. I have to say it was a fun, easy project. The only change I would make to the order of putting the ornament together would be to embroider the decorative elements before I sewed it together. It is probably just me and my inexperience at embroidery (don't look too closely at my stitches!), but I had a hard time with the embroidery with the bottom already sewn on the ornament. Despite this lack of experience, I think that the final product was pretty sweet! It definitely brightened my day to see this cute little cottage sitting on my bedside table when I woke up this morning!

Monday, November 3, 2008
Holiday Swap Time
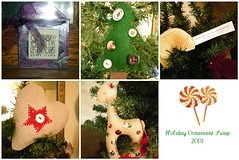
Swapping ornaments is a great way to add to your collection, or to accumulate little gifts for friends, family and teachers! My kids loved opening up the packages as they arrived too.
ONE MORE THING....
DON'T FORGET TO VOTE TOMORROW.
IT'S NO SECRET
I SUPPORT

Friday, November 30, 2007
BAA BAA ???? SHEEP
I like my sheep colorful. Sheep of different shades remind me of how much fun it is to create different colorways and patterns with fiber and dye. My swap group may think it is a little strange....but sheep of different colors will be arriving in mailboxes throughout the US and Canada in the coming weeks. Enjoy!
Tuesday, November 13, 2007
Swaps are Here!


