Tuesday, November 25, 2008

Pin Cushion Swap


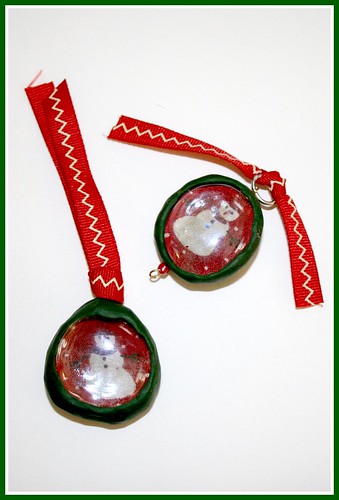
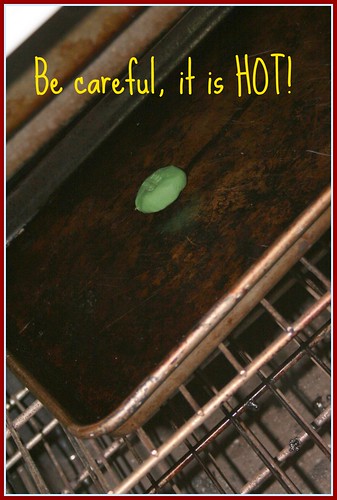
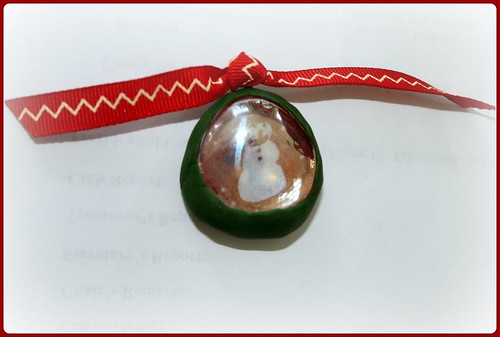
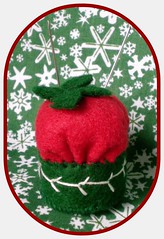
I signed up for a pincushion swap on Swap-bot today. That sounds like fun. I have a hoard of pincushions already made, so I won't have to put too much added work into the mix.  Here is a simple one I made from a bottle cap


tomato pin cushion
I did a quick search for pin cushion tutorials and found this quick sampling  for those who are interested:

How About Orange's Tiny Pin Cushion Tutorial

paper.string.cloth patchwork pincushion

Martha Stewart's strawberry pincushions

a wrist pin cushion from the Green Kitchen


If you love pincushions, you might want to splurge on this gift for yourself  Pretty Little Pincushions (Pretty Little Series).  Or, you could go to the Pretty Little Pincushion Flickr group for more inspiration!


Monday, November 24, 2008

Full House

My two older boys, 14 and 17, returned home this weekend from boarding school. We spent Saturday at the school attending workshops on the college admission process. It was extremely overwhelming but exciting at the same time. I can't quite believe that I will have a child in college in the near future!

With a full house, it is hard for me to focus on crafting. With the constant demands for food, entertainment and clean laundry, I don't think that I will be able to post much until after the Thanksgiving holiday. We are heading up to New England on Wednesday for a couple of days to spend some time with our relatives. I hope that there might be a little bit of snow. We haven't had a good snow here in several years. And, since it is basically flat, farmland, my kids don't ever get to go sledding. It would be such fun to get in a bit of that with the cousins!

I was able to finish up the little house ornaments for the Christmas Ornament Swap before the boys came home. My kids think that I am a little loopy, making so many. I also was inspired to make a couple of Christmas trees to go along with the houses. Then I finished off with the needle felted sheep that I make. Basically, I have a complete village now.

sheep
make me stop
village

Thursday, November 20, 2008

Embroidery 101


Posted by Picasa

I have been trying to get better at my embroidery stitches.  Awhile back I made a first attempt at this on some tea towels that I had been saving.  I was lucky enough to get my hands on a copy of Sublime Stitching: Hundreds of Hip Embroidery Patterns and How-To.  Since I have a little schnauzer, Snappy, I decided to try the scottie pattern in the book (it sort of looks like a schnauzer).  I made two of them and gave one to my mother.  We have been using the one I kept in my downstairs powder room/laundry room.  It has been washed multiple times, and still looks good!  That says a lot for a simple towel from the Dollar Tree and my novice handiwork!


Posted by Picasa
Since it turned out so well, I am constantly trying to find appropriate but cost efficient towels to embroider on.  Unfortunately, Dollar Tree doesn't have anymore of the cute style above.  I looked at Walmart and found some plain white terrycloth bar towels.  They are suitable for patchwork applique but not really for embroidery.  I am wondering if there are any resources out there that I don't know about???  I suppose I could just break down and make the towel myself.  

I need to do something because I landed at the nicest blog today, Nini Makes.  It is the kind of blog that really appeals to me because showcases lots of different things like crafts and cooking and family life.  It also has lots of tutorials which is just what I need!  There was a wonderful PDF of a little happy Christmas tree scene perfect for embroidering on a tea towel.  I left a comment and was pleasantly surprised to find an email from Joan with the PDF attached. This design would perfectly embellish a little towel or pillow for a holiday hostess or teacher gift.  Thanks so much to Joan!  

Wednesday, November 19, 2008

Day 2: Little Glass Frame Ornament Tutorial!

Little Frame Ornament
Here is an EASY ornament that you can make in 30 minutes! It is also a good project for school-aged kids with adult supervision.

SUPPLIES NEEDED:

Glass Pebbles from Craft Store - Larger Size (about 1")
Sculpey Clay
Scraps of Holiday Material & Ribbon
Small amount of Wire
Glue Stick
Scissors
Holiday Stamps

Supplies

1. Position a glass pebble on top of holiday fabric to create a frame of pattern on fabric. Cut out a square of fabric around the edges of the pebble.

2. Rub glue stick on bottom of pebble and on fabric square.

Glue

3. Glue fabric onto pebble, centering your pattern. Cut circular shape around edge of pebble. It doesn't have to be precise, because clay will cover edges.

Cut Cirlce

4. Make a ball of sculpey clay about the same size as your pebble. Work it in your hands to soften it. Shape it into a flat circle a little larger than your pebble.

Sculpey

5. Cut a small amount of wire and make a loop.

6. Smoosh loop into back of clay.

7. Position clay onto back of fabric on pebble with wire in the top center back.

8. Form a frame around pebble with clay.

Wire

9. Use stamps to stamp pattern on back of ornament.

Stamp

10. Cook as directed on clay package. This is where adult supervision is required. Be careful, the little ornament will be HOT!

Hot!

11. Let the ornament cool and harden. Then string ornament through the wire loop with a small amount of ribbon.

12. Your done!

Your Done!

Instead of material you could use old Xmas cards, or a small picture of a child or pet. I also made one with silver jewelry finding as the wire and a bead at the bottom. Instead of an ornament, this could become the focal point of a necklace. Add a ring and make a key chain. The possibilities are endless!

Monday, November 17, 2008

A Week of Handmade Ornaments


Polaroid-Frame-Flat, originally uploaded by poketypatch.

So, I have been going a little overboard on making ornaments lately, and I have decided to feature a few of my creations. I am going to try each day to add another ornament. We will see if I actually make it...

On the first Saturday of every month, there is a local flea market at the Fire House. It is really a cross between a yard sale and an antique show. You never know what you will find. Back in August, a dealer had these little antique hearts. I bought them thinking I would use them for a baby blanket. However, since it is not looking like there will be anymore babies in my family (or extended family) anytime soon, I decided a better use might be to make some ornaments.

Quilt Shapes

This is perfect for an old holey quilt! You can just cut shapes out of the good parts. I used a simple cotton fabric for the backing. It was a cinch to sew them up using blanket stitch. I left a little bit unsewn, stuffed with scraps and polyester stuffing, and then closed her up!

Heart Front

Heart Back

When I was stuffing, I slipped in a little sachet of lavender made from a recycled dryer sheet. I figured that once the holidays were over, the heart could hang on a closet door or be placed in a sock drawer to keep everything smelling fresh!

Friday, November 14, 2008

Quick Ribbon Swap

Posted by Picasa

I sent off some little scraps of ribbon today for a ribbon swap on swap-bot. It was quick and easy and the little envelope is on its way to Indiana!

Wednesday, November 12, 2008

Little House Ornament


little house front, originally uploaded by poketypatch.

I decided it was time to start thinking about making some ornaments since I signed up for the Ornament Swap again this year. I received my list of swap partners yesterday. The group is being administered by swap-bot.  This is a pretty cool site, especially if you like to participate in swaps.  I signed up for another swap that is swapping ribbon!  I think it is interesting and awesome that most of my swapping partners in the ornament swap are from the opposite parts of the USA than me, and two are from other countries! Last year my whole family got into the excitement of receiving the different ornaments. I hoping that this year will be just as much fun. 

To get in the mood, I did a quick GOOGLE search of handmade ornaments. The first site that popped up was Pimp Stitch. I was a little taken back by the name, but clicked anyways. Well, I hit the motherload - not only was there the absolute best tutorial here for a wee little house ornament, but there were tutorials for lots of embroidery related crafts!

The most recent post on the blog chronicled an interview with Jenny Hart of Sublime Stitching: Hundreds of Hip Embroidery Patterns and How-To. Do you ever think that things just are supposed to happen, like clicking to a blog on a whim, and finding just exactly what you are currently interested in? During a recent surgical recuperation, I used the book Sublime Stitching to start learning how to embroider with it's great projects and patterns.

So, last night I took the plunge and made one of the little house ornaments. I have to say it was a fun, easy project. The only change I would make to the order of putting the ornament together would be to embroider the decorative elements before I sewed it together. It is probably just me and my inexperience at embroidery (don't look too closely at my stitches!), but I had a hard time with the embroidery with the bottom already sewn on the ornament. Despite this lack of experience, I think that the final product was pretty sweet!  It definitely brightened my day to see this cute little cottage sitting on my bedside table when I woke up this morning!


Monday, November 10, 2008

Migraine Fighter

Last night I needed this eye pillow for an awful migraine.


I used the pattern in Amy Butler's In Stitches: More Than 25 Simple and Stylish Sewing Projects book to make this a few weeks back.  I used fleece for the backing so it is extra soft.  I also filled it with my secret ingredient, a little pouch of lavender from my garden.  The pouch is made from a recycled fabric dryer sheet.  I cut up a rectangle out the the sheet, fold it in half and sew up each side.  Then you fill it with lavender and sew up the top.  It works perfectly inserted in your project and protects the lavender from spilling out through  a loose seam!  

There are many legends surrounding lavender.  It's scent is thought to combat stress and promote relaxation.   The word “lavender” comes from the Latin "lavare" which means to wash. In early times, washer women were called lavanders or lavenders because to lavender meant to launder and the lavendar plant itself was used to keep fabrics smelling fresh.  

Folklore also links fairy activity to wherever lavender is planted. These fairies bring healing, protection, and aid in overcoming emotional blocks [and migraine headaches!].  That is why lavendar planted around the house is rumoured to keep bad spirits away.  I have it planted right up the front walk to my house for that very reason!  We need all the help we can get! 

I love lavender!


Friday, November 7, 2008

My Lucky Day

Today was a good day.  First, I don't work on Fridays.  So, I was home just fooling around all day.  You know, rearranging furniture with Christmas tree in mind...contemplating cleaning out the attic but watching John Stewart and Steven Colbert instead.  

Second, I sold a pair of longies on eBay.


Third, I got this is the mail today...


Just a little transaction I made last week on eBay with The Trend Boutique.  I was in desperate need for a new jacket, and found this one at a great price.  It is absolutely lovely and fits perfectly. And, I feel really trendy when I put it on!

Fourth, my 17 yo son called last night from Boarding School.  Mom's with kids in Boarding School know how much this means.  Just getting a call is, well, astounding!  He informed that he had gotten the highest grade in his class on his Chemistry Lab - a 99! We might have a doctor in the making!

But the best thing that happened was that I got an email from Kristin to inform me that (drum roll please) I had won the new Anna Maria Horner book Seams to Me: 24 New Reasons to Love Sewing as a Week One - Home for the Holidays prize winner!  Boy was I surprised, since I don't win things....ever.  I feel so lucky! I have been wanting that book so much, but couldn't justify another purchase for myself right now.  

Thanks so much to Sew Mama Sew!  Don't wait, go and check out this great site and all of the beautiful, trendy fabric they sell. 

Thursday, November 6, 2008

Okay, so yesterday I was speechless. No words could describe how happy I felt about the election results. Now, I feel, we can move on with life and have some hope that favorable change will finally come for so many that truly need it! It was also so inspiring to watch the footage of the masses celebrating all over this country as well as all over the world. It seems as if the load is a little lighter today.

So, I got home a little early yesterday, and started working on a new project. Earlier in the day while blog hopping I ran across a tutorial for fingerless mitts which linked me here to Finny and got me to thinking. Basically these gals had taken a recycled sweater and turned the old sleeves into new fingerless mitts. Finny went a step further dissecting her sweater into different projects. I remembered that I had an old felted cable sweater that I used to made some woolen longies sitting in my stash pile. And so, I decided to try and make a neckwarmer the easy way! Forget knitting, I used by scissors and my sewing machine to craft one up in minutes!

I started with a full sweater minus the sleeves to make these:


They turned out so cute - sort of buttercream in color. I am thinking about sewing some little sheep on them.


Once I retrieved the sweater shell from the pile, this is what happened:


I wonder how it will look on?

Wednesday, November 5, 2008

Tuesday, November 4, 2008

Before-School Scarf


This morning there was a sense of excitement in the air. It was 7 am and my husband was already out on a strategic mission of sign placement at a local voting establishment. I was in a hurry to get ready, so I threw on my fall uniform - brown cords and a brown turtleneck. Since it is voting day, and since I am HOPEFUL that CHANGE will happen, I decided a lucky little scarf would dress up the outfit. I pulled out a quarter yard piece of silky fabric that I had been meaning to turn into a scarf - but never sat down and did it - and I decided that there is no time like the present.

I took the quarter yard piece and folded it in half longways with right sides together. I ironed the crease and then sewed up the raw edges. I left the raw edges on either side unsewn. I turned the scarf so that right sides were out, ironed so that the seam was in the middle back and then sewed up either end by ironing under 1/4 edge at an angle.


I finished this in just under 10 minutes, in between making lunches for school, getting school clothes out of the dryer and fixing my computer that had crashed (don't ask!)When I have a little more time, I will sew on some sort of edging at either end. I am thinking either beads or a nice ribbon (Velvet?)...

On the topic of scarves, do you remember a "dickey"? (Am I aging myself?) A dickey is a type of false shirt-front - like a turtleneck with a body that covers the neck area but with no sleeves or body. Recently, I have been revisiting the idea of dickies. Since the East Coast weather where I live just doesn't get too cold anymore, you need something to keep the exposed part of your neck warm without the bulk and warmth of a heavy sweater or scarf. The modern version of a dickey is now called a "neckwarmer".

Jared Flood recently designed a pattern for the "Stormy Morningside Neckwarmer" for Classic Elite Yarns. I drew two male names for our family Christmas gift swap and thought this just might fit the bill.


The "women's slouchy" version is pretty sweet too. I think I'm going to have to get my knitting needles out and start some holiday knitting. What a perfect way to watch those votes come in to night. Let's HOPE it turns out for the best!

Monday, November 3, 2008

Holiday Swap Time

I signed up for another round of the Holiday Ornament Swap sponsored by cake & pie and freshly blended. It was so much fun last year to receive unique ornaments. Here is a little taste of what I received last year:

Swapping ornaments is a great way to add to your collection, or to accumulate little gifts for friends, family and teachers! My kids loved opening up the packages as they arrived too.


ONE MORE THING....
DON'T FORGET TO VOTE TOMORROW.
IT'S NO SECRET
I SUPPORT