It was a dew drop bonanza day - dew drops are very popular on flickr these days. So, I rushed in to get my camera for a dew drop photo op. I took about 6 pictures and then my battery died, so much for the dew, and I headed in to look at what I had gotten.
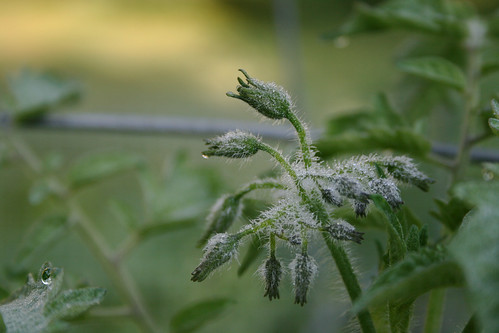
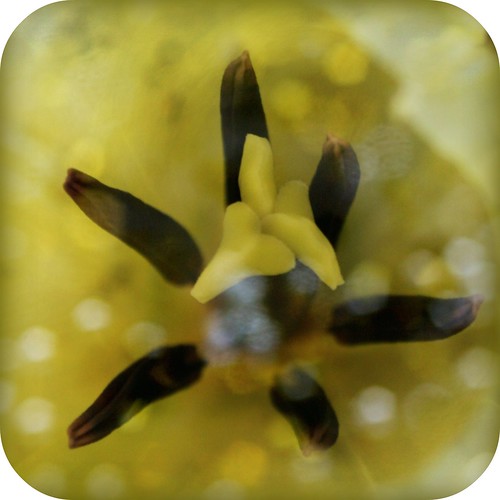
The pictures were okay. I was struck by some that I had taken of a tomato plant getting ready to blossom. The dew really stuck to the hair on each blossom, and looked sort of cool. Once I was finished processing something clicked in my brain... Yesterday, I watched the old classic "Invasion of the Body Snatchers". That is the one where giant, pea pods produce oozy zombies that take over the bodies of the people in the town. I realized that I must have unconsciously found this interesting as a result of that movie! I just hope thatmy tomato plants produce tomatoes; and, that nothing extra terrestrial will be growing out of those little buds - eek!

Monday, July 6, 2009
more tomatoes please - no ooze thank you
Saturday, July 4, 2009
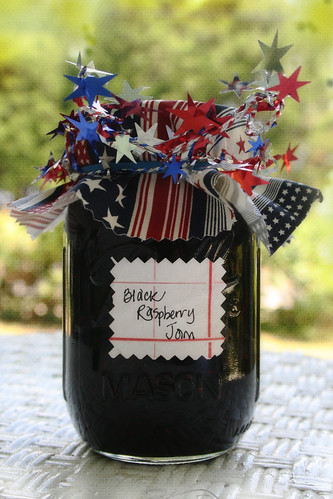
Fourth of July Jam!
Last weekend, I decided to visit a nearby farm that had fresh berries to pick. I came home with three baskets full of black raspberries, red raspberries and blueberries. 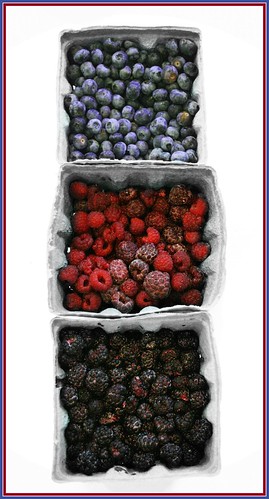
All week we have been enjoying the fruit. It is yummy on cereal, yogurt, or just to sample as snack food straight out of the fridge. I made a batch of muffins.
I used the remainder of my handpicked raspberries to whip up some Old Fashioned Raspberry Jam this morning. I thought it would be great hostess gifts for the parties we will be attending today! It was a cinch to make, here is the recipe:
Old Fashioned Raspberry Jam
4 cups (1 liter) granulated sugar
4 cups (1 liter) raspberries
1. Place sugar in an ovenproof shallow pan and warm in a 250°F (120°C) oven for 15 minutes. (Warm sugar dissolves better.)
2. Place berries in a large stainless steel or enamel saucepan. Bring to a full boil over high heat, mashing berries with a potato masher as they heat. Boil hard for 1 minute, stirring constantly.
3. Add warm sugar, return to a boil, and boil until mixture will form a gel (see tips, below), about 5 minutes.
4. Ladle into sterilized jars and process as directed for Shorter Time Processing Procedure .
Tip: To make a small boiling-water canner, tie several screw bands together with string or use a small round cake rack in the bottom of a large covered Dutch oven. Be sure the pan is high enough for 2 inches (5 cm) of water to cover the jars when they are sitting on the rack.
I found this on EPICURIOUS.COM here:
Friday, June 26, 2009
Friday, May 29, 2009
playdate on the farm

Guess who showed up to play yesterday?
PLAYTIME!
fun for Daisy (golden retriever) - not fun for Viper (8 foot long black snake)

Eventually Snappy (the schnauzer) got involved too - he took it much more seriously (the ratter in him) than Daisy who thought Viper was just a new toy.
I won't say how this story ended, because it wasn't a happy one for Viper. You can use your own imagination.
Thursday, May 28, 2009
tea time
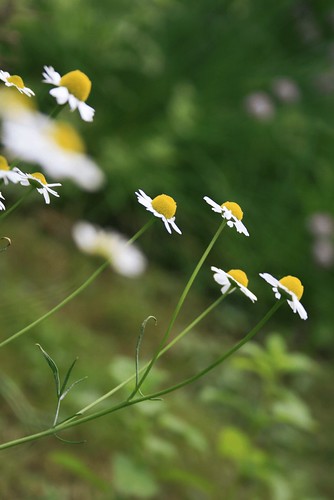
Harvest chamomile flowers for drying and for fresh use when they are fully open.
To dry, snip the flowers off with scissors, then rinse and pat dry. Place flower heads on a rack or mesh screen and set to dry in a warm location. When flowers are completely dry, store in jars in the dark.
Harvest fresh leaves as needed.
Use fresh or dried chamomile flowers to brew delectable herbal tea. Deciding which chamomile to use is a matter of personal taste. German chamomile is sweeter than Roman chamomile, which has a slightly bitter bite. Whatever your choice, both make excellent tea.
To make chamomile tea, infuse 15 mL (1 tablespoon) of fresh flowers or 10 mL (2 teaspoons) of dried flowers in 250 mL (1 cup) of boiling water. Steep for 5 to 10 minutes. Strew a few Roman chamomile flowers over a tossed green salad, and season cream sauces, butter, and sour cream by adding small sprigs of either type.
Wednesday, May 27, 2009
my garden's gift to you

“To get the full value of a joy you must have somebody to divide it with.” - Mark Twain
Friday, May 22, 2009
Make a Salad!
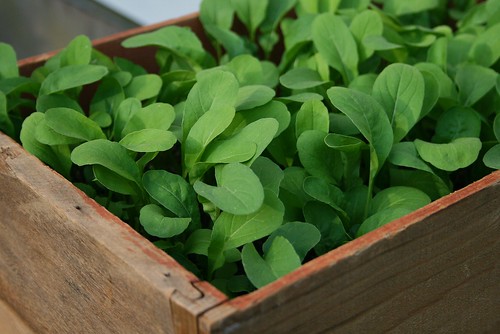
Organic Arugula
So easy to grow!
Just fill an old crate (or container) with some bagged garden soil. Plant the seeds. Keep moist. Until the seeds germinate, I just leave the box on my back porch - getting indirect sunlight. Once the seeds pop through, I move to a sunnier location - but not too bright at first. After the plants are established, they can take full sun. I also planted baby leaf spinach the same way.


Thursday, May 21, 2009
ready-set-go---plant-a-garden

guess what I am growing this year!
I have all the tools I need
my mulch carrier aka radio flyer wagon
lots of mulch
a good trowel
a great pair of gardening gloves
lots of seeds
and some organic veggies already started
from a local organic farm!
Wednesday, May 20, 2009
chocolate lollipop and teapots

I made up these little beauties for a swapbot potholder swap. The inspiration for them came from Pink Penguin. Ayumills is just so talented that you will want to try out her sewing tutorials. The teapot tutorial is found here and includes a downloadable pattern. My advice is to have your computer nearby while you are making the pattern, because I didn't and the photos would have really helped my attempt turn out a little better. The brown potholder is made from some chocolate lollipop charms I bought a while back. Can I just say that I LOVE LOVE LOVE Anna Maria Horner's fabric. It is awesome. I am going to try to make one of Ayumills' other tutorial patterns with the rest of the charms - a Reversible Patchwork Bag.
Sunday, May 17, 2009
Gardener's Journal

I have always wanted to keep a garden journal - but never followed through. Maybe if I start making some digital pages - it will inspire me to get on with it.
I need to remember to get the zinnia seeds in the ground - I want lots of these for flower arrangements! if only it would stop raining.
Saturday, May 16, 2009
Sitting on My Front Porch...

No, it's not really me
it was
created for the Textures Only ~ Competition #43
on flickr
I am really starting to get the hang
of photoshop
it only took me
about
one year...
kokeshi dotee love

received in a swapbot swap
I am in love with her
she is simply perfect
thanks to rubberstampcollector
for making her
Friday, May 15, 2009
zebra-socks

when i picked up my son from school yesterday with them on
the first comment out of his mouth
"zebra socks"
I thought he said
"zebra sucks"
I was confused
then I looked down
and saw my most favorite socks ever
Thursday, May 14, 2009
chives in my herb garden

What will I do with them? How about some
Creamy Chive Salad Dressing
175 ml (3/4 cup) non-fat buttermilk
50 ml ( 1/4 cup) reduced-fat mayonnaise
75 ml (1/3 cup) finely chopped fresh chives
15 ml (1 tbsp) chopped fresh parsley
15 ml (1 tbsp) lemon juice
15 ml (1 tbsp) Dijon mustard
Salt and ground black pepper, to taste
In a bowl, whisk together buttermilk, mayonnaise, chives, parsley, lemon juice and mustard. Season with salt and pepper.
Full article found here.
How did I process this photo? I used a photoshop cross-processing action found here.
Wednesday, May 6, 2009

Monday, May 4, 2009
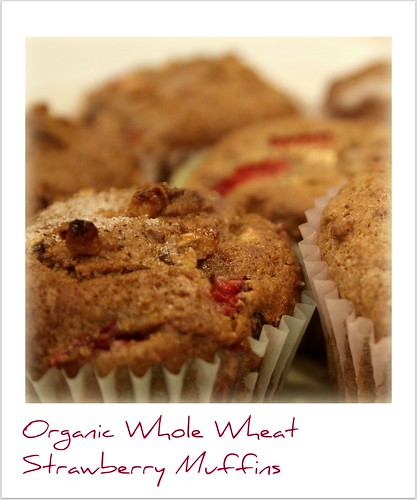
THOUGHTS ON CONSCIOUS EATING and STRAWBERRY MUFFINS
I recently checked out a new book, Food Matters: A Guide to Conscious Eating with More Than 75 Recipes
And, them came the AHA moment. I will make strawberry muffins! Those wonderful strawberries wouldn't go rotten after all!
Searching online I found the recipe at Smitten Kitchen.
 Since I had most of the ingredients, I thought that it would be pretty easy to wing this one. Here is what I did (my changes are in RED):
Whole Wheat STRAWBERRY Muffins
ADAPTED FROM SMITTEN KITCHEN that was Adapted from King Arthur Flour
Yield: They said 12, I got 15
1 cup (4 ounces) whole wheat flour (USED ORGANIC WHOLE WHEAT FLOUR)
1 cup (4 1/4 ounces) all-purpose flour
1 teaspoon baking powder
1 teaspoon baking soda
1/4 teaspoon salt
1 tablespoon cinnamon
1/2 cup (1 stick, 4 ounces) unsalted butter, at room temperature
1/2 cup (3 1/2 ounces) granulated sugar
1/2 cup DARK BROWN SUGAR plus 1/4 cup for topping
1 large egg, lightly beaten
1/3 CUP ORGANIC GREEK YOGURT and ½ CUP 1% MILK
1/2 cup ORGANIC GRANOLA
Preheat the oven to 450°F. LINE MUFFIN TIN WITH MUFFIN CUPS and set aside.
Mix together the flours, baking powder, baking soda, salt, and cinnamon, and set aside. In a separate bowl, cream the butter and add the granulated sugar and 1/4 cup of the brown sugar. [AT THIS POINT I WAS NOT FOLLOWING RECIPE WELL AND PUT IN THE WHOLE ½ CUP OF BROWN SUGAR – IT MADE MY MUFFINS EXTRA SWEET THUS THIS WAS A GOOD BLOOPER) Beat until fluffy. Add the egg and mix well; stop once to scrape the sides and bottom of the bowl. ADD THE YOGURT AND MILK – BEWARE I DID NOT MEASURE THE MILK BUT I THINK IT WAS ABOUT 1/3 CUP SO THAT THE MIX WAS WET ENOUGH TO STIR BUT STILL THICK. Stir in the dry ingredients and fold in the STRAWBERRIES and the ORGANIC GRANOLA HERE.
 Divide the batter evenly among the prepared muffin cups, sprinkling the remaining 1/4 cup brown sugar on top. Bake for 10 minutes, turn the heat down to 400°F, and bake for an additional 5 to 10 minutes, or until a toothpick inserted into the center of a muffin comes out clean. Cool the muffins for 5 minutes in the tin, then turn them out onto a wire rack to cool completely.
BEWARE...you can't eat just ONE!
Sunday, May 3, 2009
strawberry goodness

There is nothing like fresh strawberries! And, I have a whole bunch in the fridge that need to be eaten. So, I decided to make some strawberry muffins. I used as many organic ingredients as I had on hand - organic whole wheat, organic yogurt and granola, as well as some sugar, milk and fresh laid eggs! I found a great recipe online at the smitten kitchen, which I adapted to what I had in my cupboard. The results were fabulous! My 12 yo son even stated that I had "outdone" myself.
Monday, April 27, 2009
look what flew in this weekend...

This guy decided to fly into our kitchen this weekend. It took 3 of us to get him out the kitchen window. I swear at one point (the first shot in the collage) the bird was catatonic - we thought that he was paralyzed with fear. But really, he was just waiting to go for my dh...it reminded me of a scene in THE BIRDS...and thus we got the broom out. It was quite an experience!
This is him afterwards - I think that he enjoyed driving us crazy!

Saturday, April 25, 2009

Friday, April 24, 2009

Wednesday, April 15, 2009

Saturday, April 11, 2009
Fun with ATCs

I am having a lot of fun making and swapping atcs. It is satisfying to have a way to use of all the odds and ends of recycled things that I have been saving too! I have it bad - I just don't like to throw things away that could serve some crafty purpose. Today I ran across a great use for recycled envelopes...bookmarks at Go Make Something.

There is a wonderful tutorial. Basically, you cut off a corner of an envelope and then decorate it like you would an atc. It forms a pocket that can fit over the top corner of a book page to mark your place. What a great idea!
Thursday, April 9, 2009


Wednesday, April 8, 2009
Easter Bunny Dotee

So now I can post this little guy, because I know he got to his destination in Iowa safe and sound. He was really fun to make and extra special because his new owner is Iowa Sunshine who I know will take great care of him!
Tuesday, April 7, 2009
TShirt Makeover - Tuesday Tutorial Link

This is one of my favorite ones. I like the long sleeves for warmth in the airconditioning during summer, and cooler warmth during the winter.


Monday, April 6, 2009

Sunday, April 5, 2009
Go make a Honey Bunny
 Picture by Orange you Lucky

Saturday, April 4, 2009
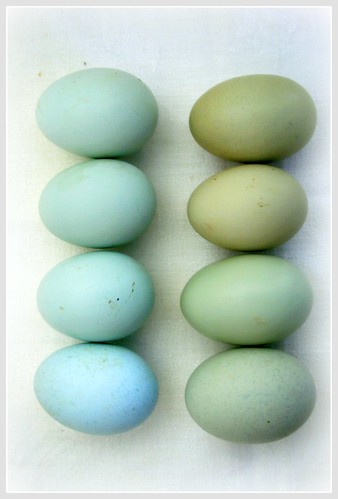
Egg Love
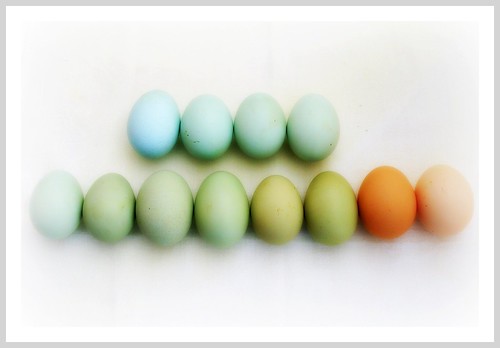
I bought these at a local flea market today. The lady who sold them said that the colors are all natural. The chickens that they came from have blue feet and blue beaks! I am in love with these colors. They are too pretty to eat!
Friday, April 3, 2009
Easter Fun


